

A few months ago I started seeing some poster in San Francisco about this game called L.A Noire. The text effect was really cool, sort of old style neon effect. I know I have done a few tutorials showing how to create this type of effect, but I needed to do that again in Photoshop.
So in this tutorial I will show you how to create the text effect like you see in the L.A Noire game cover. The whole tutorial will take about 1-1:30h. It's a bit tricky but it's not easy and the outcome is really cool.
Step 1
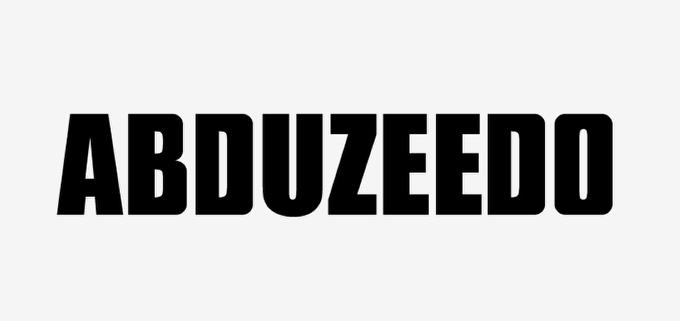
The first thing to do is create the text you will use for the background of the neon. I used Illustrator for this part because it's easier to play with fonts. So basically I am using Arial Black for the font, however I changed the B, D and O so they are not so rounded.
Step 2
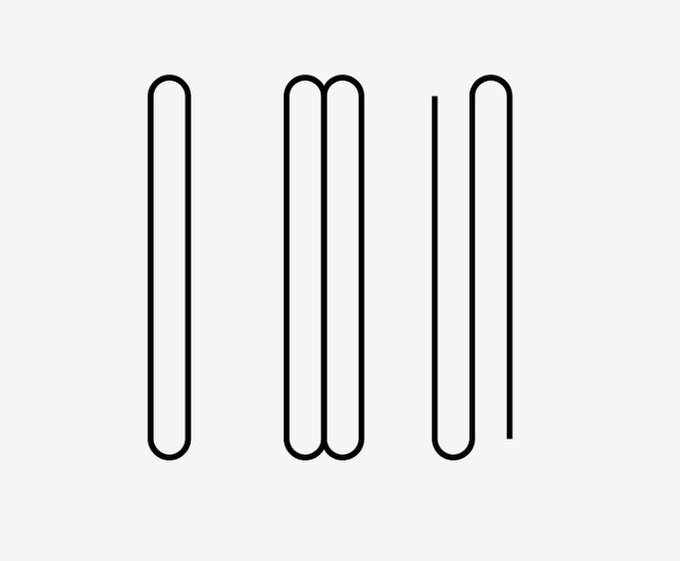
To create the neons use the Rounded Rectangle Tool. Start with a 100% rounded rectangle, then duplicate it and move it so you have one next ot the other. After that with the Direct Selection Tool (A) delete the rounded of the top of one of the rectangles and the bottom of the other. Use the image below for reference.
Step 3
Create the rest of the letters. Look at the B, D, and O. To create those letters you will basically repeat the previous step however with some different tweaks to make them fit in the character you are working on.

Step 4
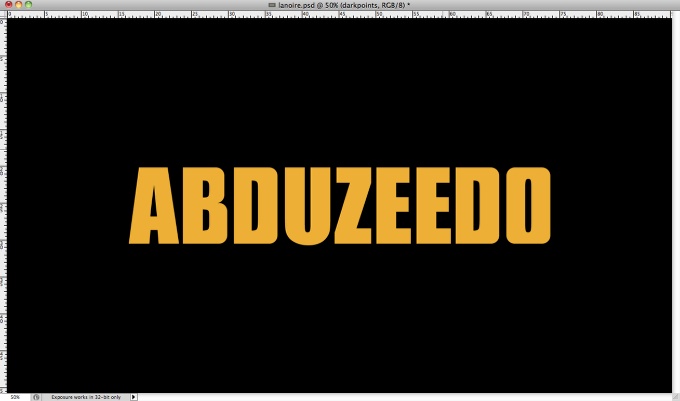
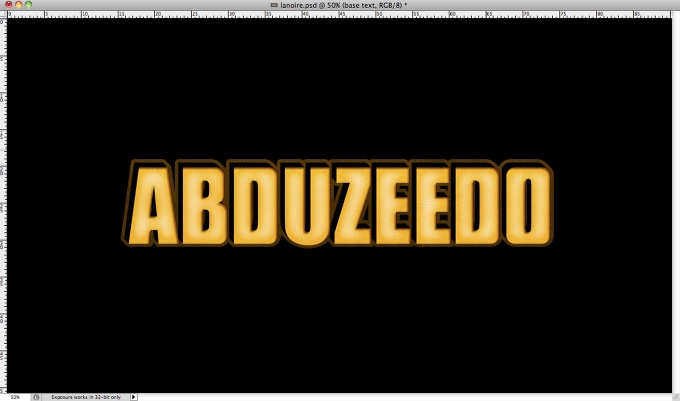
Open Photoshop and create a new document. I am using 2560x1440 for the size. Fill the background with black and then copy the ABDUZEEDO work from Illustrator and paste it in Photoshop. I am using yellow (#f0af17) for the color.
Step 5
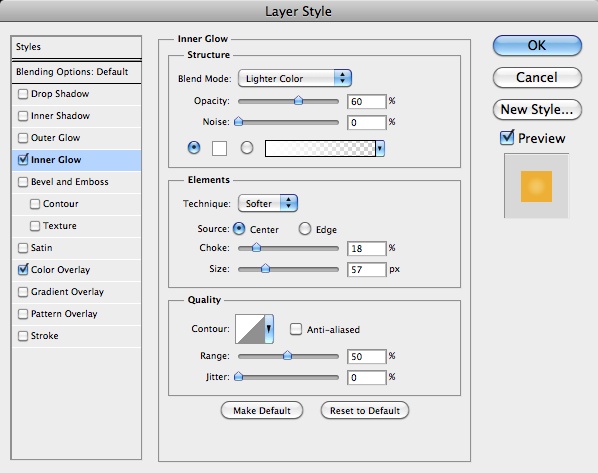
Go to Layer>Layer Styles>Inner Glow. Use Lighter Color for the Blend Mode, 60% for the Opacity, Center for the Source, 20% for the Choke and 60 pixels for the Size.
Step 6
Select Inner Shadow. Use black for the color, Linear Burn for the Blend Mode, 40% for the Opacity, 45º for the Angle, 10 pixels for the Distance, 5% for the Choke and 5 pixels for the Size.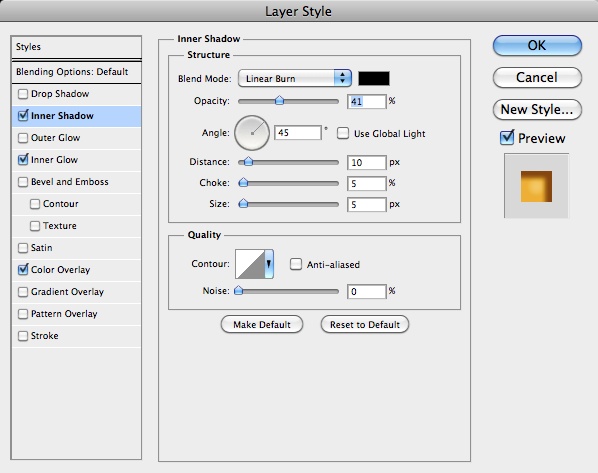
Step 7
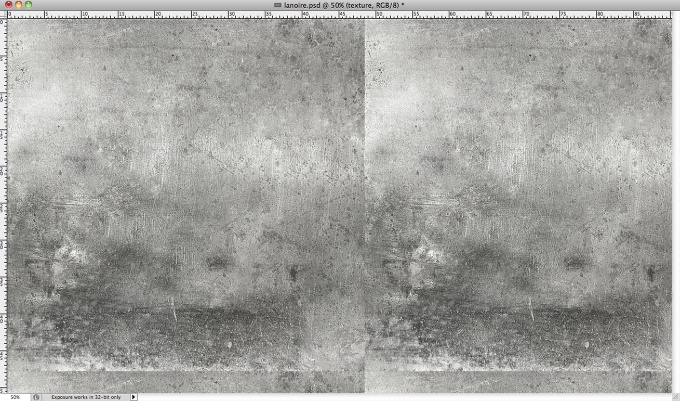
Now let's use some texture to give more realism. The one I am using is courtesy of Shutterstock and you can find it athttp://www.shutterstock.com/pic-20761540/stock-photo-metal-plate-background-texture.html
Step 8
Change the texture Blend Mode to Overlay at 30% Opacity.
Step 9
Duplicate the text and fill the layer with black, after that start duplicating and moving 2 pixels up and left. Repeat that a few times to create a sort of 3D extrusion. After that select all layers you created for that effect and merge them into one (Layer>Merge Layers).
Select the layer and go to Layer>Layer Styles>Stroke. Use 14 pixels for the Size, 40% Opacity and (#b47200) for the color.
 Step 10
Copy the neon objects from Illustrator and paste it in Photoshop. Then go to Layer>Layers Styles>Blending Options. Change the Fill Opacity to 0%.
Step 11
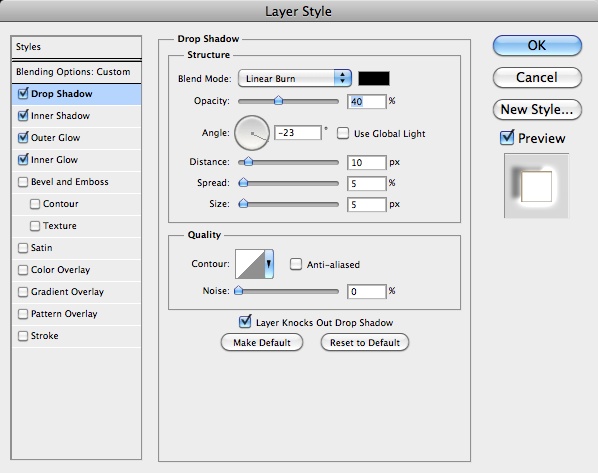
Select Drop Shadow. Use black for the color, Linear Burn for the Blend Mode, 40% for the Opacity, -23% for the Distance, 5% for the Spread, 5 pixels for the Size.
Step 12
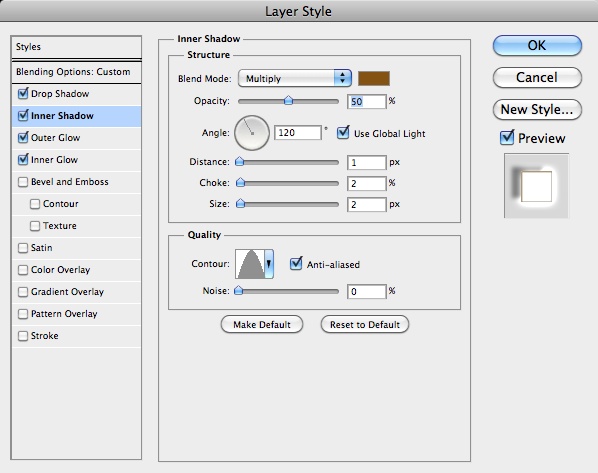
Select Inner Shadow. Use Multiply for the Blend Mode, #865200 for the Color, 50% for the Opacity, 120º for the Angle, 1 pixel for the Distance, 2% for the
Step 13
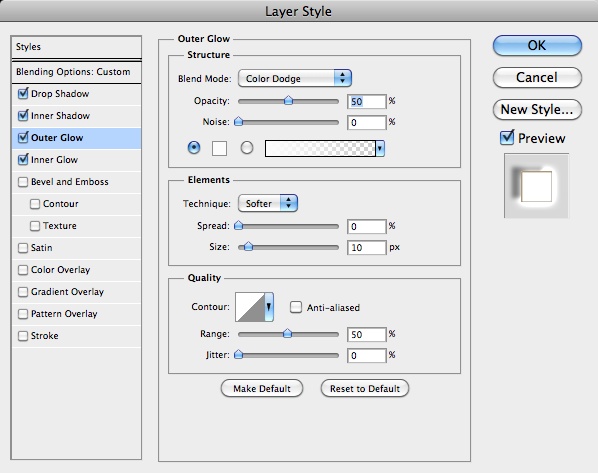
Select Outer Glow. For the Blend Mode use Color Dodge at 50% Opacity and white for the Color. Also change the Spread to 0 and the Size to 10 pixels.Choke, 2 pixels for the Size and for the Contour use the same I used in the image below.
Step 14
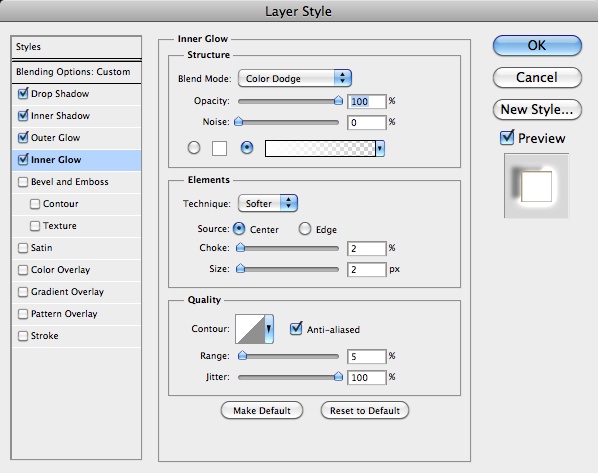
Select Inner Glow. Then use Color Dodge for the Blend Mode at 100% Opacity. Also change the Source to Center, Choke to 2%, Size to 2 pixels, Range to 5% and Jitter to 100%.
Step 15
Now let's do the same but this time to create some dark spots. So add a new folder but this time change theBlend Mode to Linear Burn at 80%. Then add the layer inside the folder and with the Brush Tool (B) and a soft brush with black for the color paint some dark areas. Use the image below for reference.
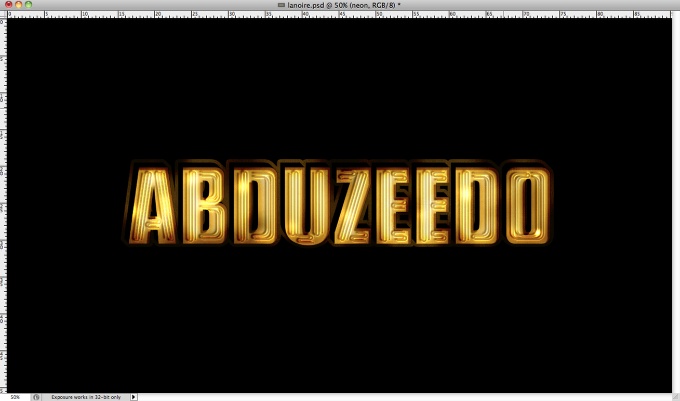
Done..you have completed the tutorial :)


0 comments:
Post a Comment